 How-to
How Do You Measure Your Head for a Motorcycle Helmet?
Last Updated: November 20, 2026
Quick Summary
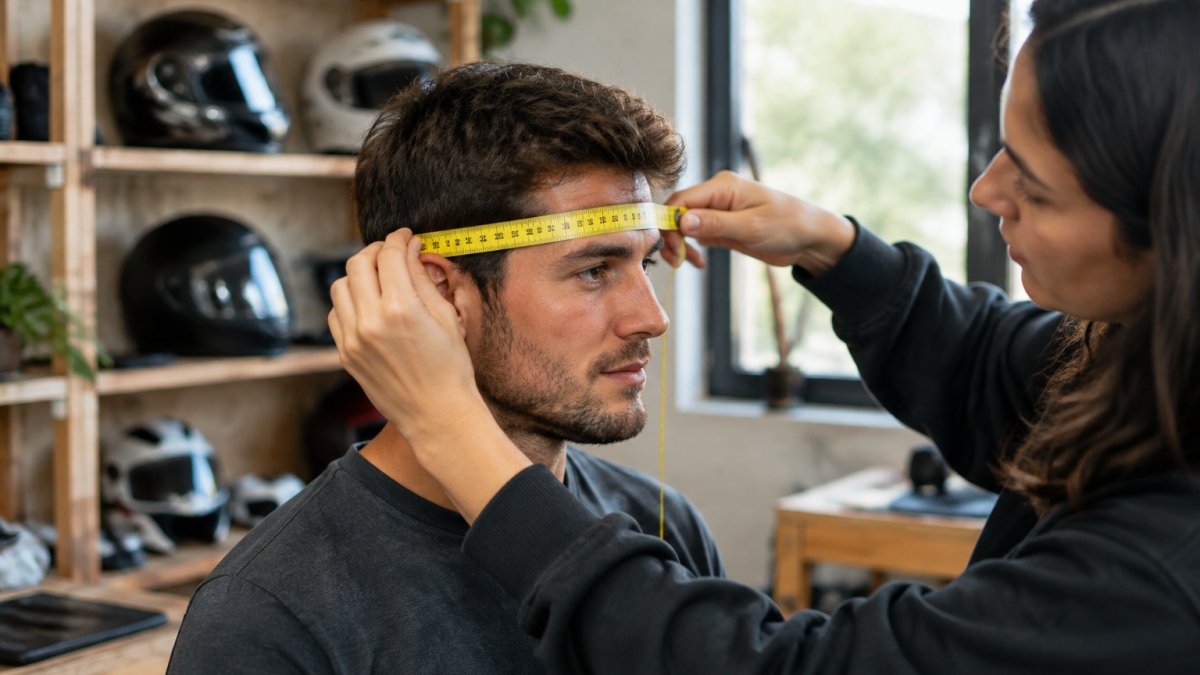
To measure head for a motorcycle helmet, wrap a soft measuring tape around the widest part of your head, across the forehead just above the eyebrows and above the ears, keeping the tape level and snug. Measure three times and use the largest reading to pick your size.
- Keep the tape flat and level; a twisted or tilted tape gives a false reading.
- If your three readings differ, take the largest one for your size.
- Without a soft tape, use string or paper and lay it flat against a ruler.
- If you land between sizes, go up, since a loose helmet can be tightened with padding.
- Measure with your hair as you normally wear it, never over a cap.
Table of Contents
- How to Measure Head for Motorcycle Helmet: The Step-by-Step Protocol
- How to Measure Head Size for Helmet Without Tape
- How to Measure Head for Helmet Shape, Not Just Circumference
- Using a Motorcycle Helmet Size Chart and Choosing Between Sizes
- How to Check Motorcycle Helmet Fit After Measuring
- Ordering a Premium Helmet Online: Getting Your Size Right First Time
- Frequently Asked Questions
How to Measure Head for Motorcycle Helmet: The Step-by-Step Protocol
A helmet only protects you when it fits, and fit starts with one number: your head circumference. Getting this measurement right makes the rest of the buying decision much easier.
Here is the full protocol. It takes about five minutes.
Step 1: Wrap the Tape Around the Widest Part of the Head
Use a soft measuring tape, the kind a tailor uses. Wrap it around your head at the widest point: across your forehead just above the eyebrows, above the ears, and around the back of the head.
Keep the tape flat against the skin. A twisted tape gives a false reading.
Step 2: Keep the Tape Level and Snug, Then Read the Number
The tape must stay level all the way around. If it dips at the back, the number comes out short; if it rides up, it comes out long.
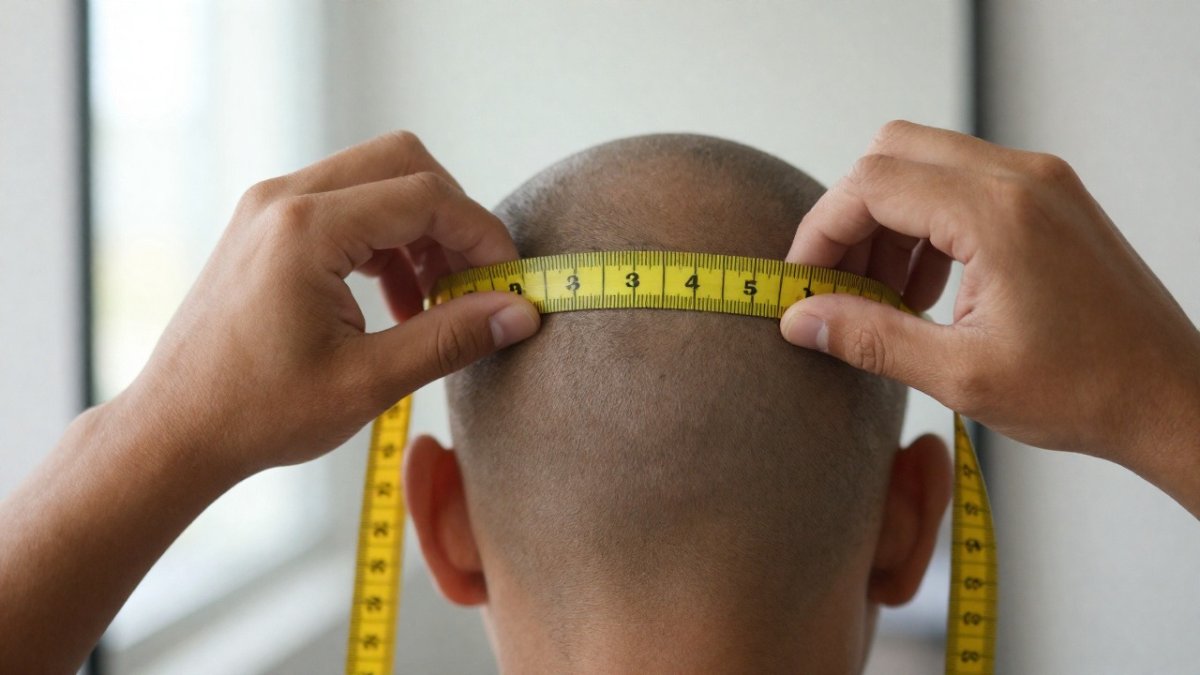
Step 3: Repeat the Measurement Three Times
One reading is not enough. Measure three times and compare the results.
- If all three match, you have your number.
- If they differ, take the largest reading.
- If they differ by more than a centimeter, check that the tape is level and try again.
Why the largest? A slightly loose helmet can be tightened with padding; a too-tight one cannot be fixed.
How to Measure Head Size for Helmet Without Tape
No soft tape? Use string or a strip of paper. Wrap it around your head at the same line, above the eyebrows and ears. Pinch where the ends meet, then lay it flat against a ruler or tape measure.
- String stretches. Do not pull it hard.
- Mark the meeting point with a pen so it does not slip.
- Measure the marked length twice to confirm.
This works well enough to pick a starting size, a first pass, not a final answer.
How to Measure Head for Helmet Shape, Not Just Circumference
Circumference gets you into the right size range; head shape decides whether that size actually feels right. Two riders with identical measurements can need different helmets.
Most riders fall into one of three groups:
- Intermediate oval: slightly longer front to back than side to side. The most common shape.
- Round: close to equal in both directions.
- Oval: noticeably longer front to back.
How to Identify Your Head Shape at Home
You do not need special tools. Use a mirror and a soft tape, or ask someone to photograph your head from directly above.
- Measure from the most prominent point of your forehead to the base of your skull at the nape.
- Measure the width across the widest part of your temples.
- Compare the two. If length exceeds width by roughly 2-3 cm, you lean oval; if they are close to equal, you lean round. Most riders sit in between, which is why intermediate oval is the most common shell shape.
Riders with a round shape often feel pressure at the forehead in an oval shell, while oval-shaped riders get pinched at the sides in a round shell. Neither problem shows up on a size chart.
Pressure Points a Size Chart Cannot Reveal
After a correct circumference measurement, the next diagnostic is where the helmet touches you. Put the helmet on and leave it for two to three minutes without fastening the strap. Then check these zones:
- Forehead: firm, even contact is normal. Sharp pressure or a red line within minutes suggests the shell is too round or too small.
- Temples: pinching usually means the shell is too narrow, common for oval heads in round shells.
- Cheeks: firm cheek-pad contact is expected and should ease as the liner breaks in. Pain or numbness is not normal.
Watch out: a helmet that presses hard on the forehead or temples will not loosen with break-in. Padding settles slightly, but a shell that is genuinely the wrong shape stays wrong.
If your shape leans round, an open-face design often sits more comfortably than a full-face shell. You can browse an open face helmet to see how shape affects the fit you are checking.
Using a Motorcycle Helmet Size Chart and Choosing Between Sizes
Helmet manufacturers publish their own size charts, and the ranges do not always line up. Always use the chart from the brand you are buying.
A typical chart looks like this:
| Size | Head Circumference |
|---|---|
| XS | 53-54 cm |
| S | 55-56 cm |
| M | 57-58 cm |
| L | 59-60 cm |
| XL | 61-62 cm |
Head Circumference
Landed between sizes? Go up. You can add thickness with the comfort liner or a balaclava. You cannot shrink a shell.
Once you know your measured size, it helps to see a real product in that size. Our full face helmet in camouflage green is a good place to check how a measured size maps to an actual shell.
How to Check Motorcycle Helmet Fit After Measuring
The measurement is the start, not the finish. A helmet passes the fit check only when it stays put, feels snug without pinching, and remains comfortable after several minutes of wear.
Step 1: Static Fit Check
Put the helmet on without fastening the chin strap. It should slide on with mild resistance at the brow and ears. Once seated:
- The brow should sit just above the eyebrows, not covering them.
- The cheek pads should press firmly against your cheeks without pain.
- The crown should make even contact with no single hot spot.
Leave it on for two to three minutes. A pressure point that forms in that window will not disappear with break-in.
Step 2: Retention-System Check
Fasten the chin strap and adjust it so you can fit two fingers under the strap, no more. Then:
- Open your mouth wide. The helmet should pull down slightly on your head. If it does not move at all, the strap is too loose.
- Shake your head gently side to side. The helmet should move with your head, not lag behind it.
- Check that the buckle or quick-release mechanism locks securely and releases cleanly.
Step 3: Roll-Off Test
With the strap fastened, grab the front of the helmet and try to roll it forward off your head. It should not come off. If it rolls free, the size is too big or the strap is too loose. Repeat the test rolling backward; the helmet should resist that direction too.
Step 4: Movement and Vision Check
With the helmet on and fastened, turn your head left and right and look up and down. The shell should not shift independently of your head, and the eye port should not obstruct your peripheral vision. If it slides when you turn, it is too loose; if the brow presses into your forehead when you look up, the shell is too shallow or too small.
Step 5: Time and Discomfort Check
Wear the helmet for five to ten minutes indoors. Normal snugness should feel firm but not painful. Watch for:
- Numbness or tingling in the forehead or temples
- Red pressure lines that persist after removal
- Pain at the cheekbones or jaw
Any of these signals means the helmet is the wrong size or shape, even if the circumference matched the chart.
Common Fitting Mistakes and Pressure Points to Watch
The most common mistake is measuring over thick hair or a cap. Measure with your hair as you normally wear it, nothing added.
Other traps to avoid:
- Measuring with the tape tilted instead of level
- Choosing a size because it is "your usual size" in clothing
- Ignoring forehead pressure because the rest feels fine
Watch out: a helmet that presses hard on the forehead or temples will not loosen with break-in. Padding settles slightly, but a shell that is genuinely too small stays too small.
Apply these checks to a real product and the process makes more sense. A jet helmet is a good model to practice the roll-off test on, since the open design shows movement clearly. If the issue is at the visor line rather than the shell, replacement Guang full face helmet visors can solve a fit problem the padding cannot.
Ordering a Premium Helmet Online: Getting Your Size Right First Time
Buying a high-end helmet without trying it on is the moment measurement pays off.
Advice for online orders:
- Measure three times and keep the largest reading.
- Check the brand's own chart, not a generic one.
- Note your head shape before you choose a model.
Riders often ask whether a helmet will suit their head shape before it arrives. If you are completing an order, a Midnight motorcycle jacket pairs well with a new helmet and saves a second delivery.
Fit first, style second. Get the measurement right and the premium helmet you have been eyeing will feel like it was made for you.
Getting the size wrong is the one mistake that turns a premium helmet purchase into a hassle.
Frequently Asked Questions
What is the 2-2-2 rule when fitting a helmet on your head?
The 2-2-2 rule is a quick fit check: you should be able to fit two fingers between your eyebrows and the front of the helmet, the chin strap should sit with about two fingers of room under the jaw, and the helmet should not lift more than two fingers' width when you push it up from the back. If any of those fail, the shell or strap is wrong for you, even if the circumference matched your measurement.
How do I measure my head for a helmet without a tape measure?
Use a piece of string, a phone charging cable, or a strip of paper. Wrap it around the widest part of your head, mark where the ends meet, then lay it flat against a ruler or a printed ruler template. Measure three times and take the largest number. Convert to centimetres if your size chart uses metric, then check the helmet's own chart rather than a generic one.
Can I use a general helmet size chart to choose any motorcycle helmet?
No. A general motorcycle helmet size chart is a starting point, not a guarantee. Each brand builds its shells and comfort liners differently, so a 57 cm head can sit in a medium in one range and a large in another. Always check the manufacturer's size chart for the exact model, and ask the retailer about returns or exchanges before you buy if you cannot try it on first.
How should a motorcycle helmet fit once it is on?
It should feel snug but comfortable, with even pressure across the forehead and cheeks and no single sharp pressure point. Grab the chin bar and try to roll the helmet forward and off; the skin on your forehead should move with it. Cheek pads should press firmly but not pinch, and a new helmet may loosen slightly as the liner breaks in. If it slides or lifts easily, size down or try another shape.
